VPN Installation Guide: Mac (3 Steps)
Step 1: Download Ivanti Secure Access Client
Download Ivanti Secure Access Client version 22.8.3 for Mac
VPN Server URL: vpn.library.ucdavis.edu (step-by-step instructions below)
Step 2: Install Ivanti Secure Access Client on MacOS
- After downloading Ivanti Secure Access Client, locate the PulseSecure.dmg file in your Downloads folder and open it.
- Open the PulseSecure.pkg file to begin installation.
— Note: If you get an error 1205 or “PulseSecure.pkg” warning please see our Library VPN FAQ.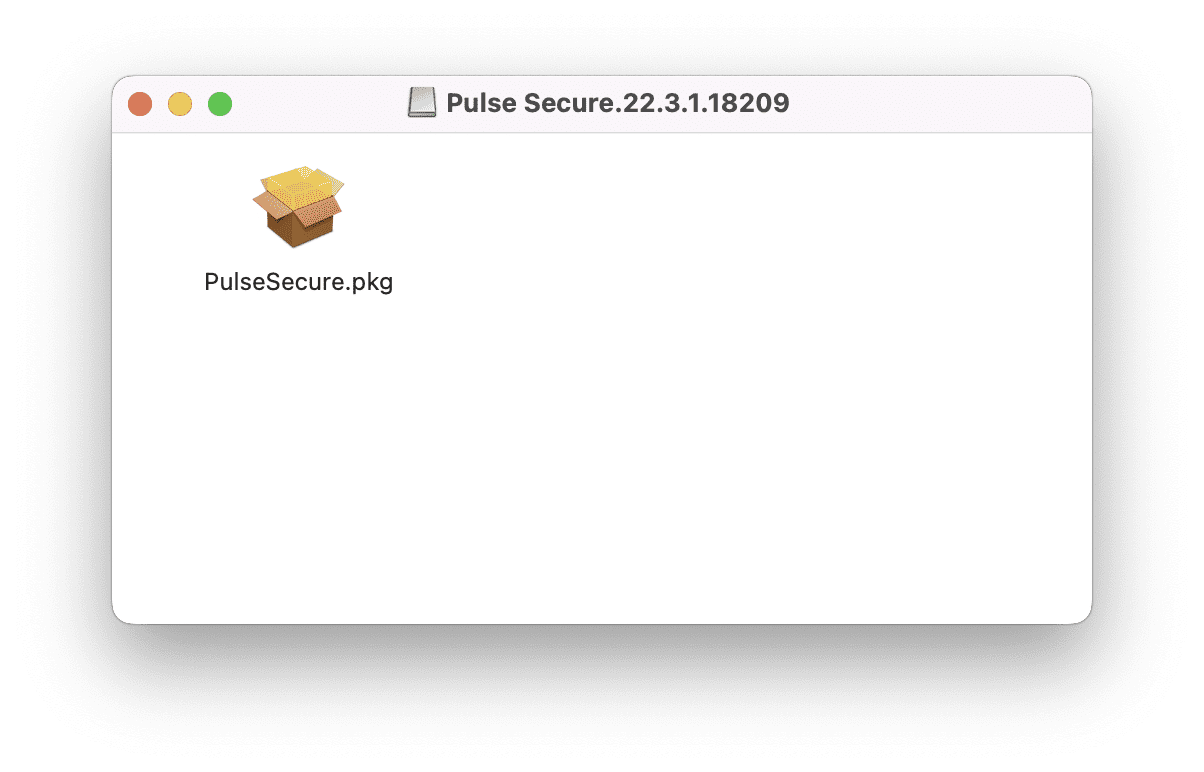
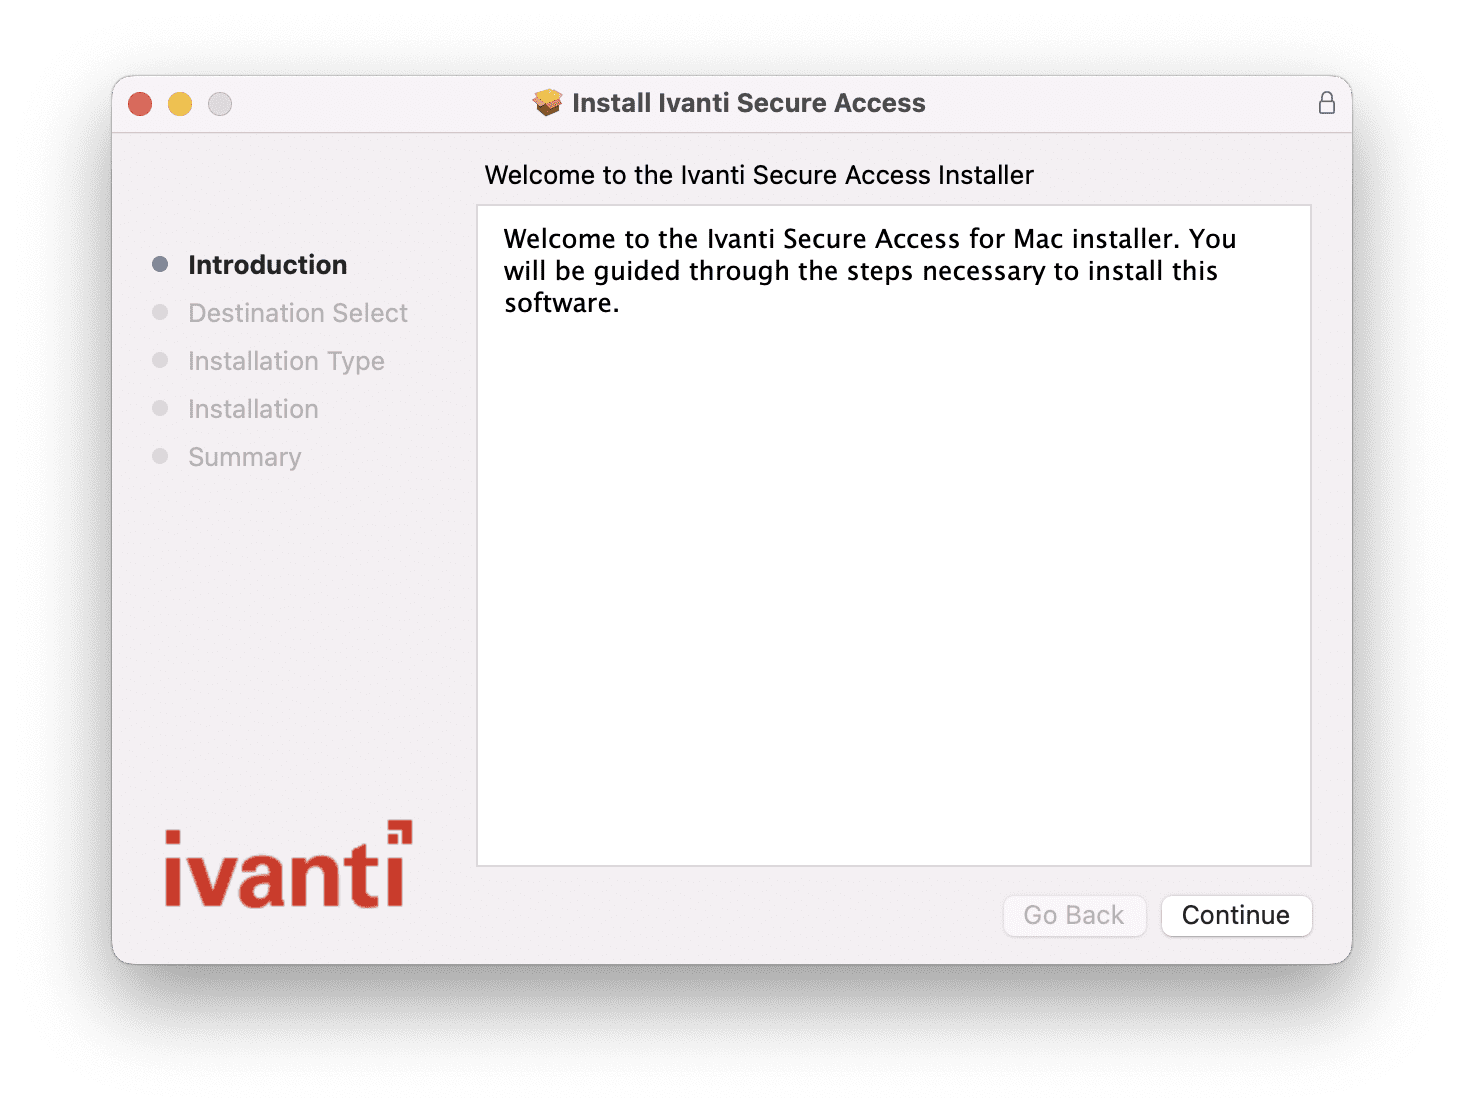
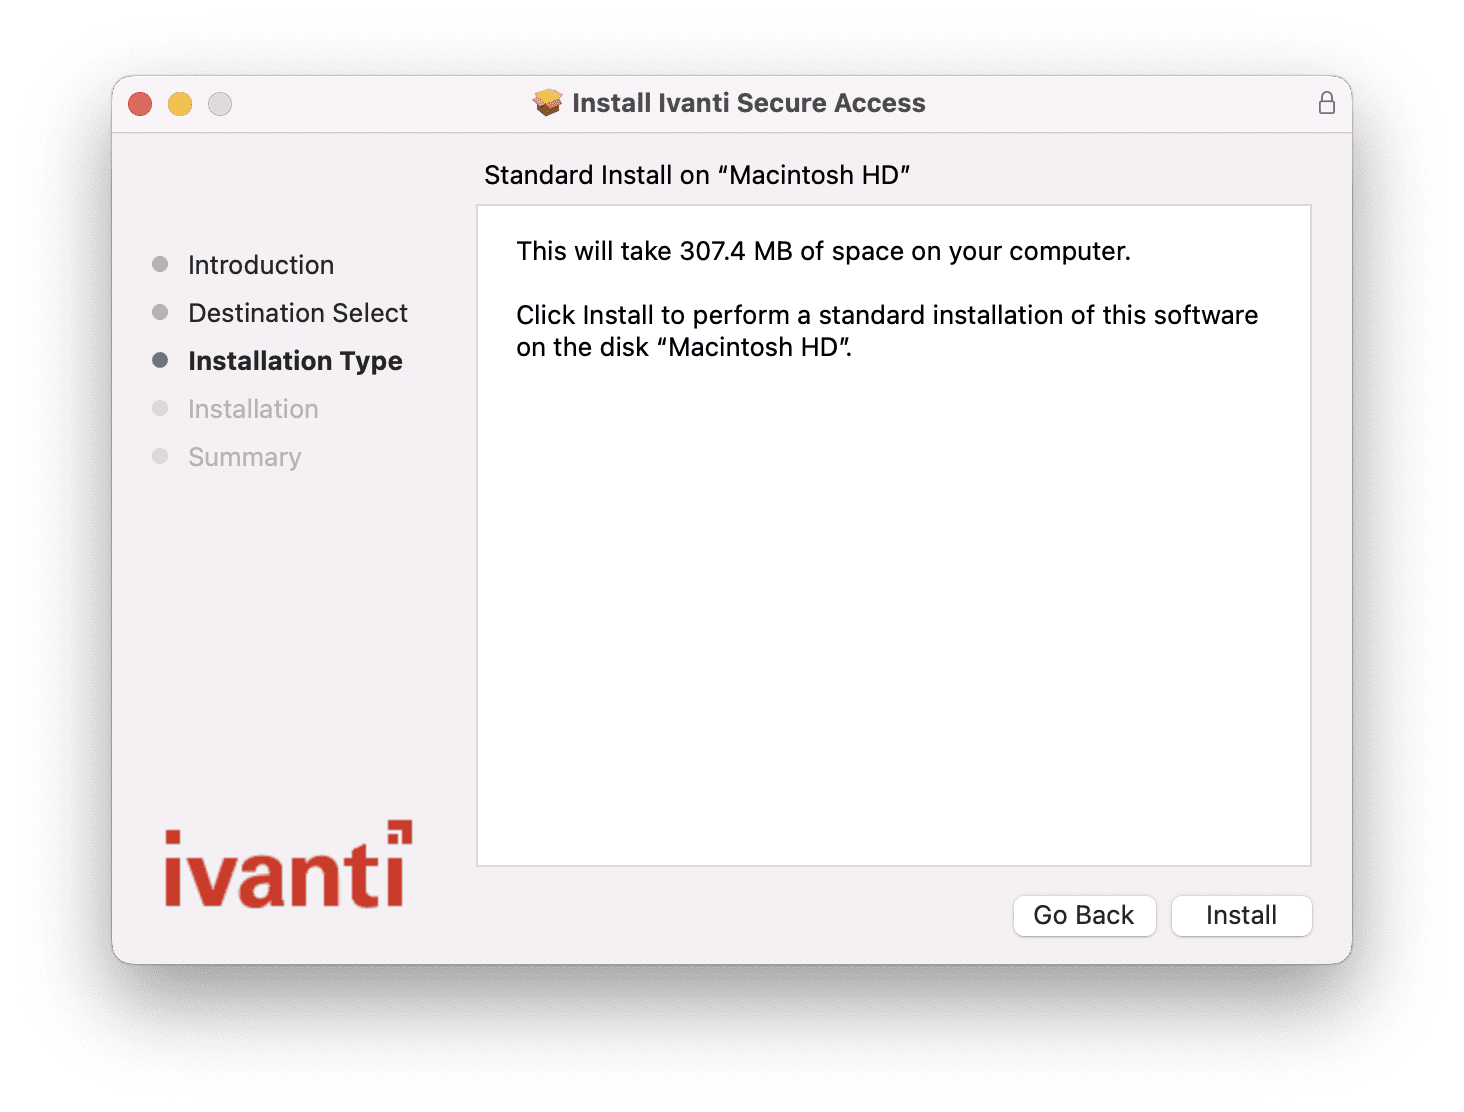
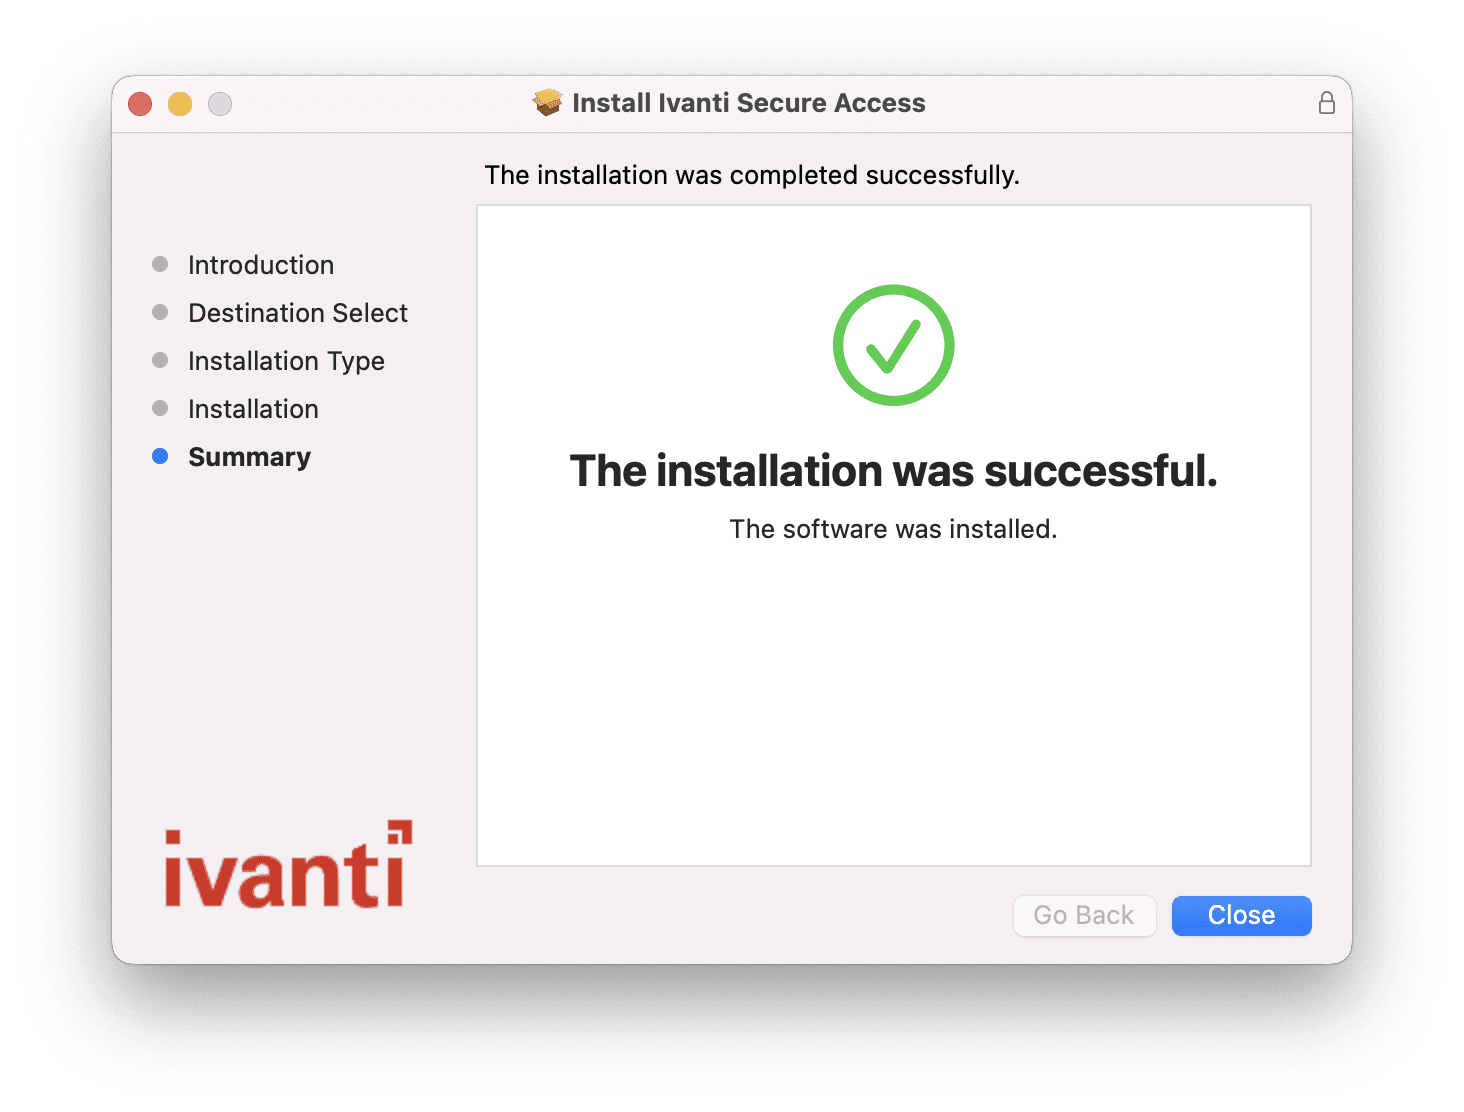
- Click the Continue and Install buttons when prompted by the installer.

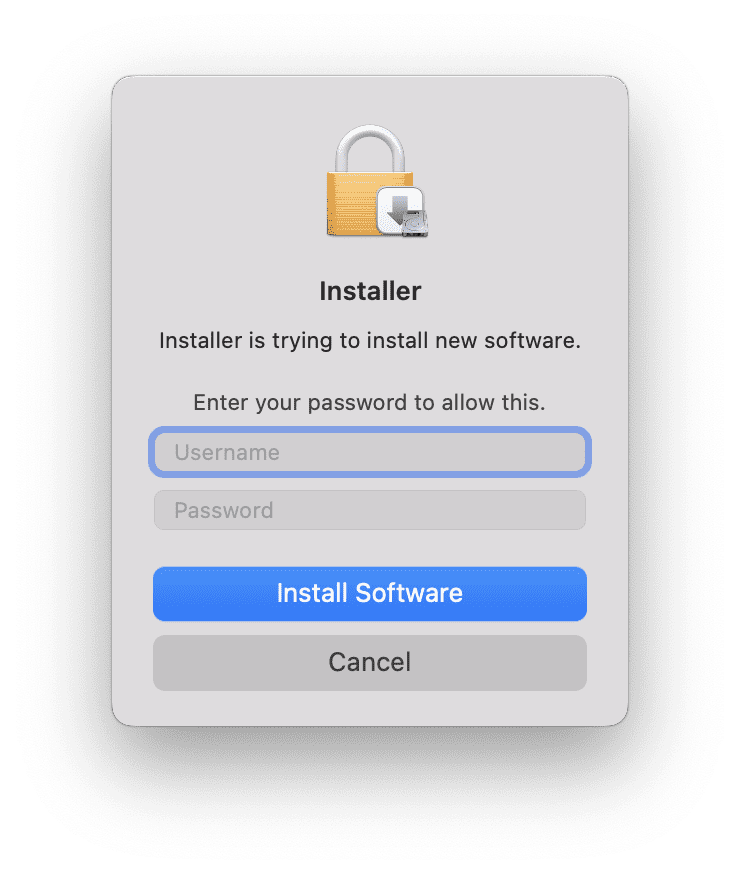
- When prompted, enter the password you use to log in to your computer, then select Install Software.
- Once the set-up is complete, select Close.
Ivanti Secure Access Client is now installed! Next, let’s configure it to connect to the library VPN.
Step 3: Configure Ivanti Secure Access Client to Connect to the Library VPN
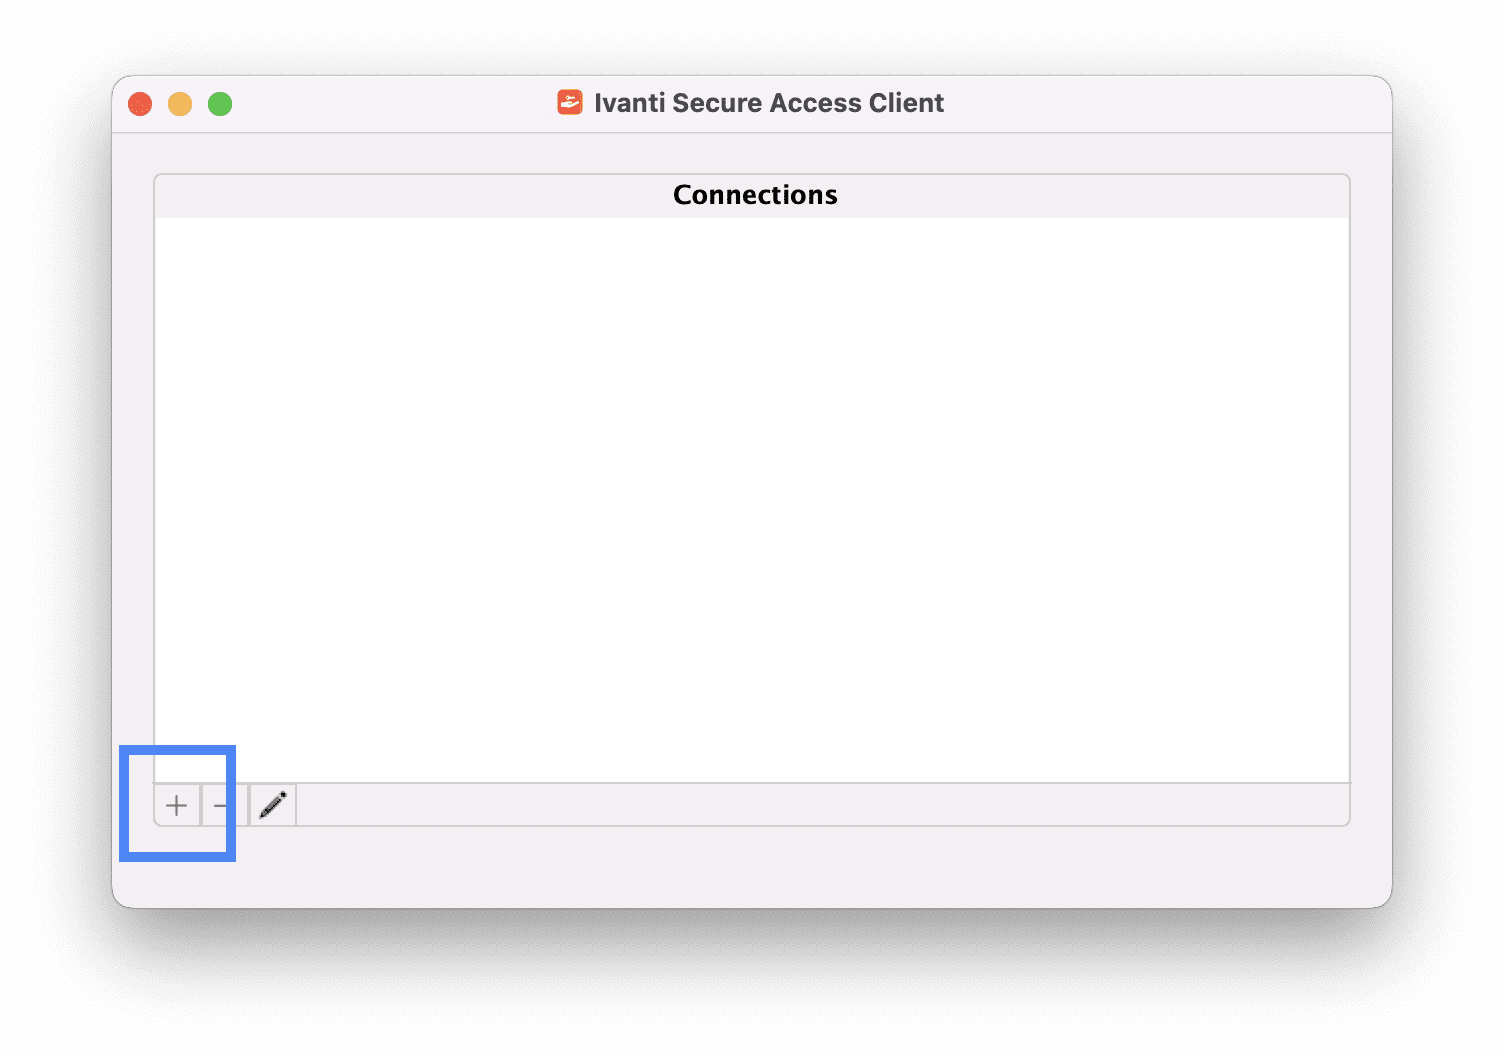
- Open Ivanti Secure Access Client. You may do this in one of two ways. Either navigate to your Applications folder and locate Ivanti Secure Access Client, or select the Ivanti Secure Access Client icon in the menu bar at the top of your display and then select Open Ivanti Secure Access Client.
- Select the Plus button to open a new connection.
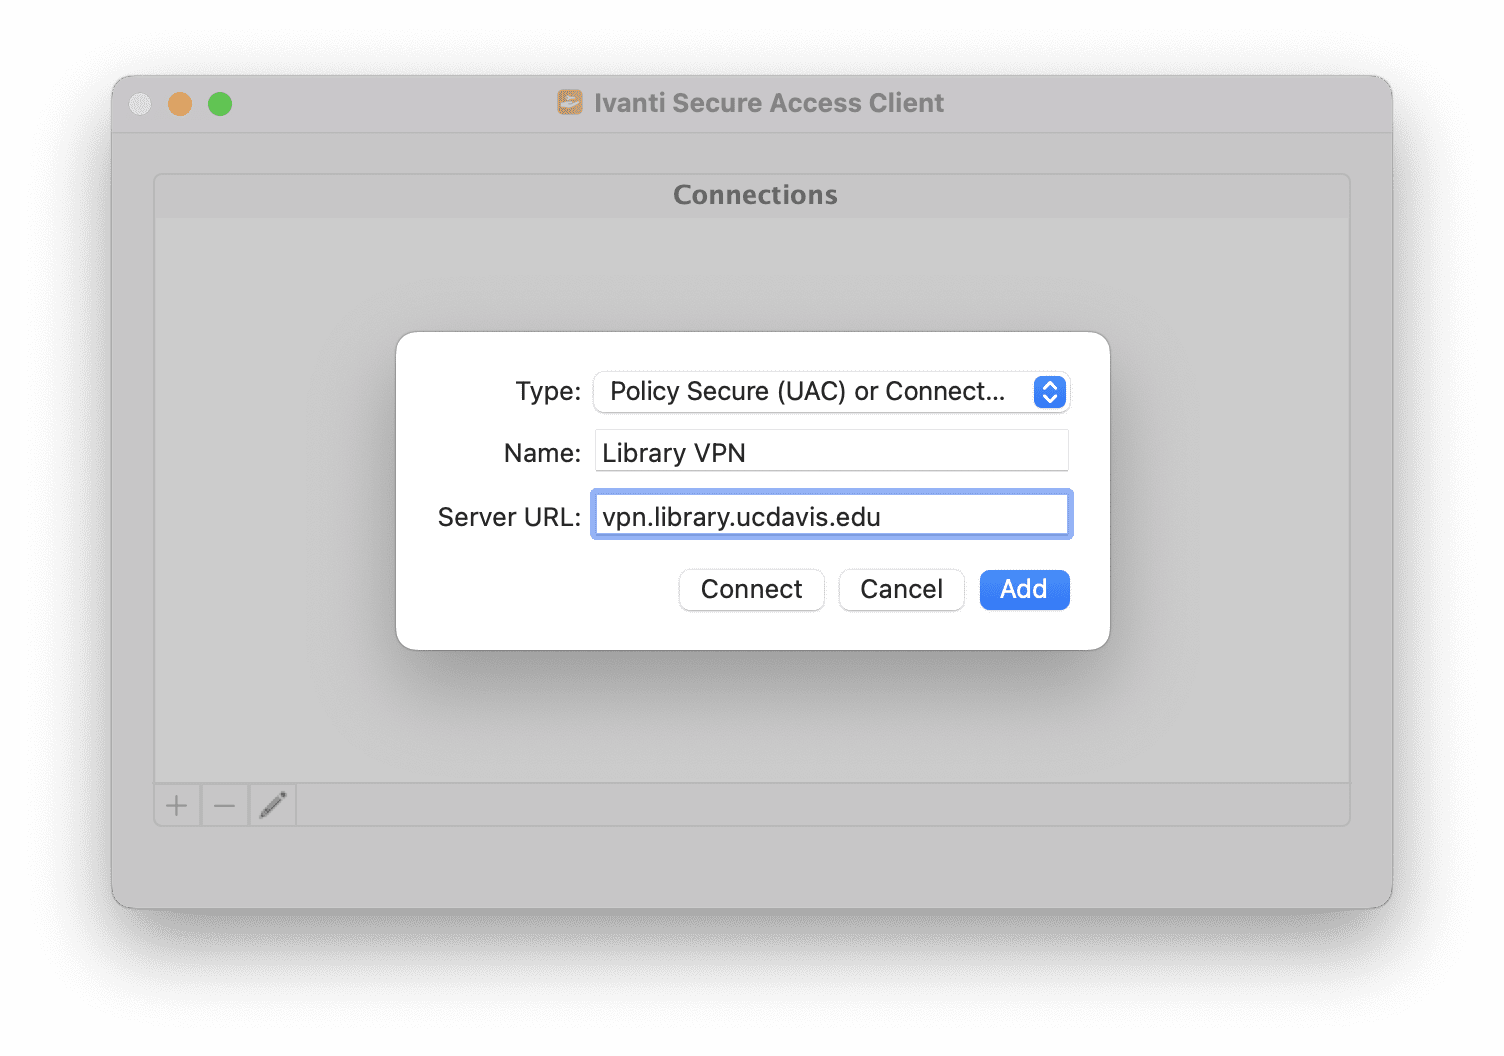
- Enter the following VPN connection information and then select Add to save the connection.
Type: (do not change this setting)
Name: Library VPN (or another name of your choosing)
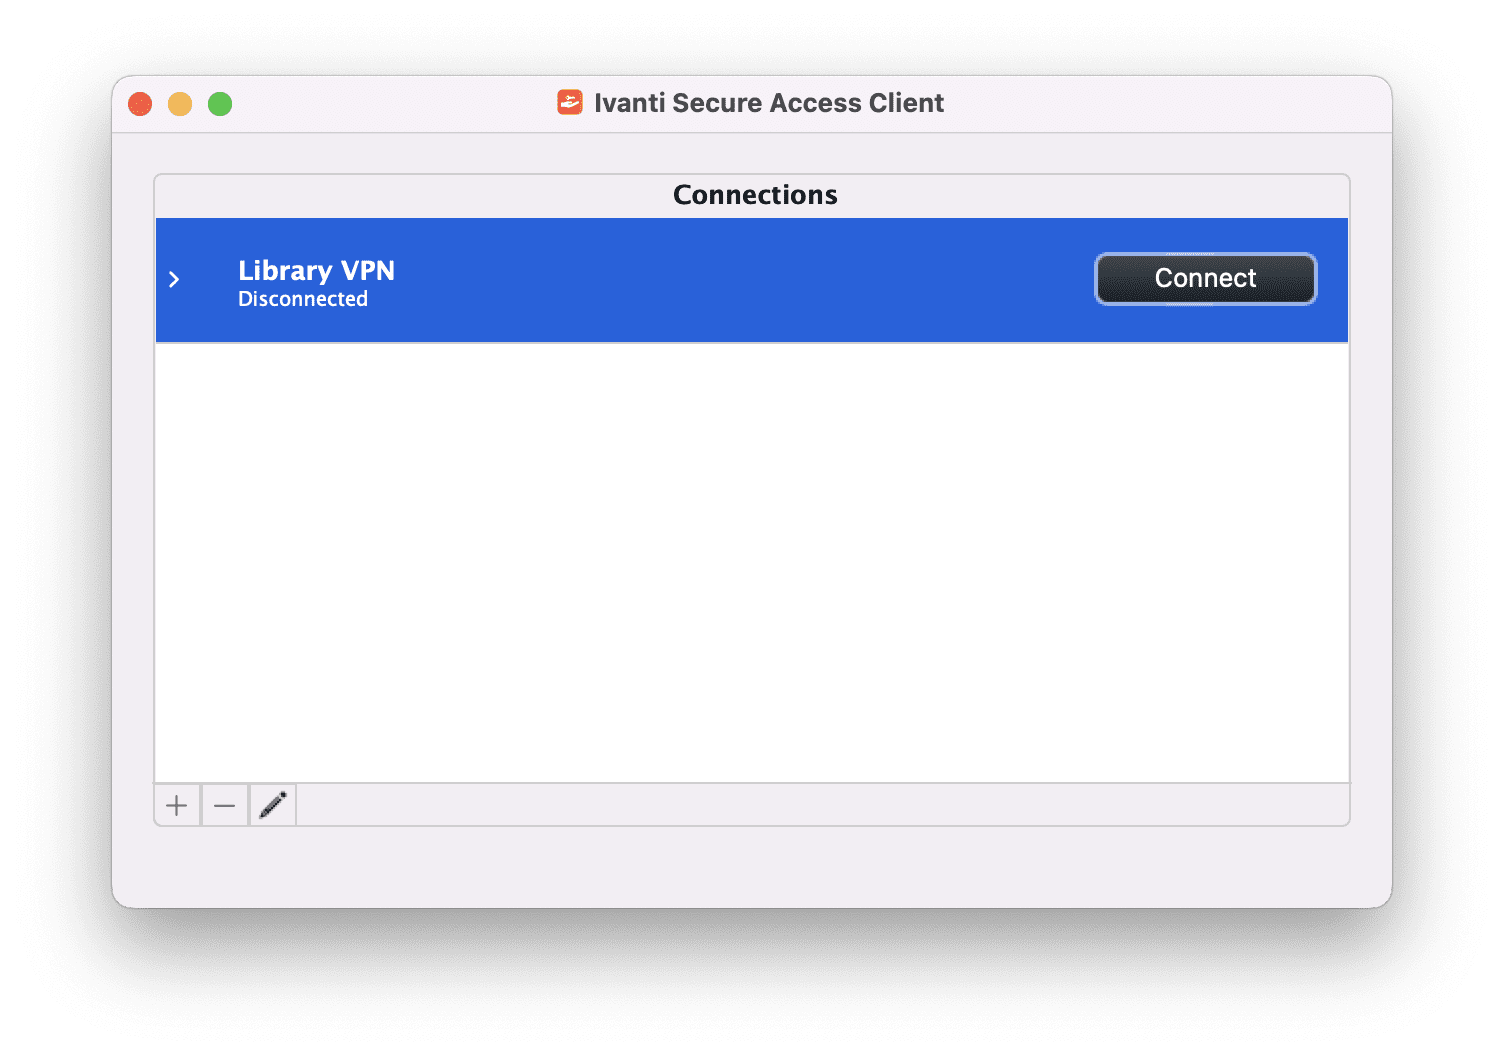
Server URL: vpn.library.ucdavis.edu - “Library VPN” will now appear as an option in your Connections list. Select Connect to activate the connection.
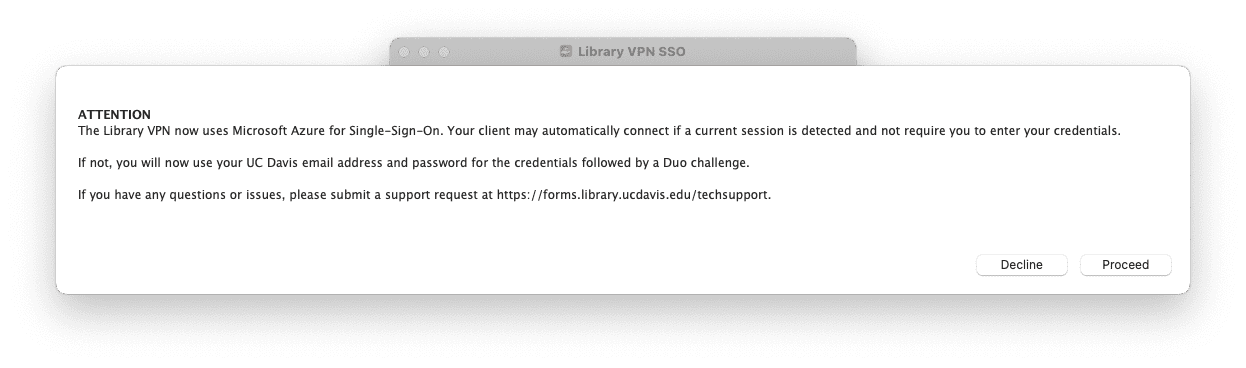
- When a single-sign-in notice appears, select the Proceed button. A Microsoft sign-in box will appear. Enter your UC Davis email address and then sign in using your UC Davis credentials. You will then be asked to authenticate using Duo (see our Library VPN FAQ for Duo authentication options). Note: UCDH users that have an @health.ucdavis.edu email account MUST use their @ucdavis.edu email address for Library VPN authentication. The @health.ucdavis.edu address will not work.
- A green checkmark will appear in your Connections list once the connection is successful.

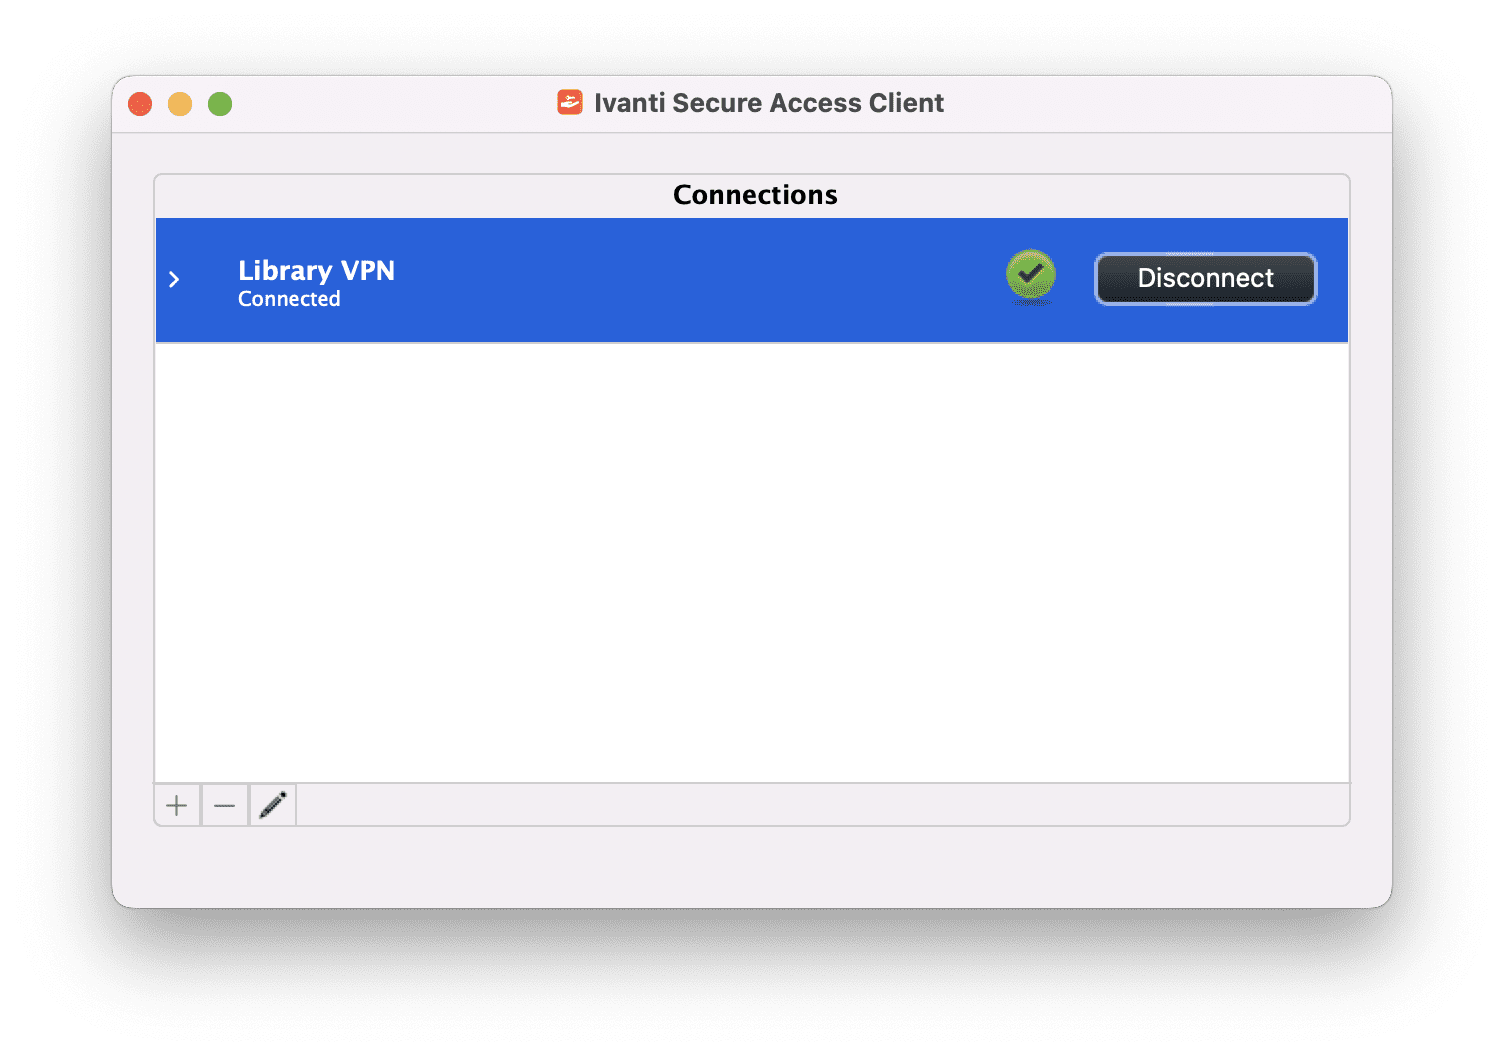
Congratulations, you are now connected to the library VPN and have access to all of the library’s online resources!