VPN Installation Guide: Apple iPhone or iPad (2 Steps)
Step 1: Install Secure Access
Get Secure Access from the Apple App Store
Step 2: Configure Secure Access to Connect to the Library VPN
Instructions apply to both iPad and iPhone; screens may vary slightly.
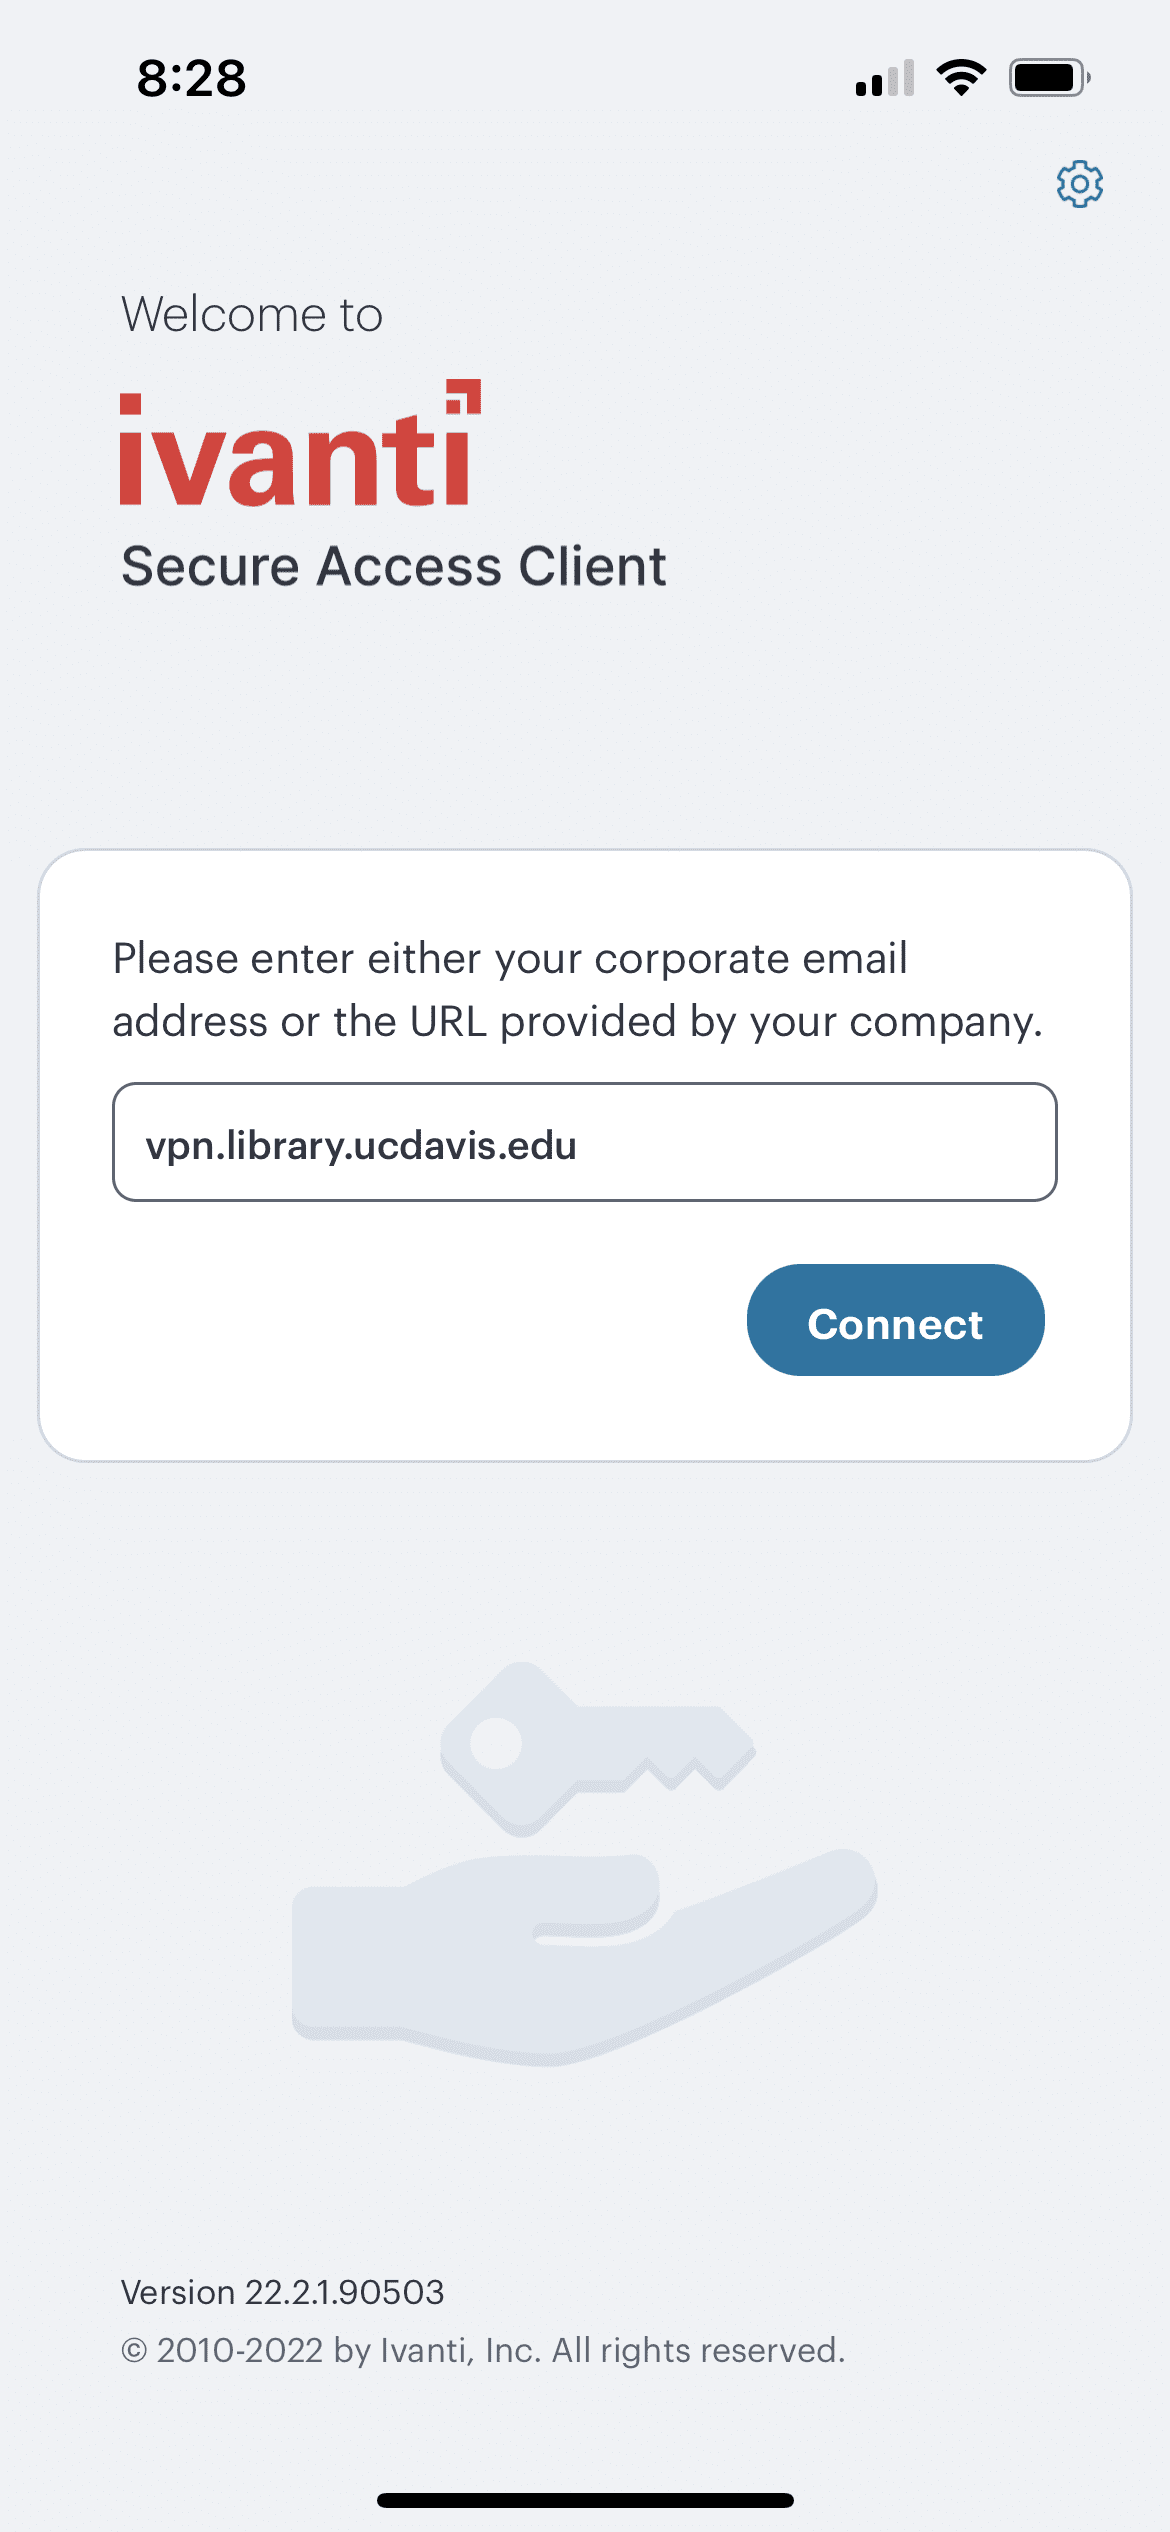
- Open the Secure Access client. When prompted for the corporate email address, enter vpn.library.ucdavis.edu and then select Connect.
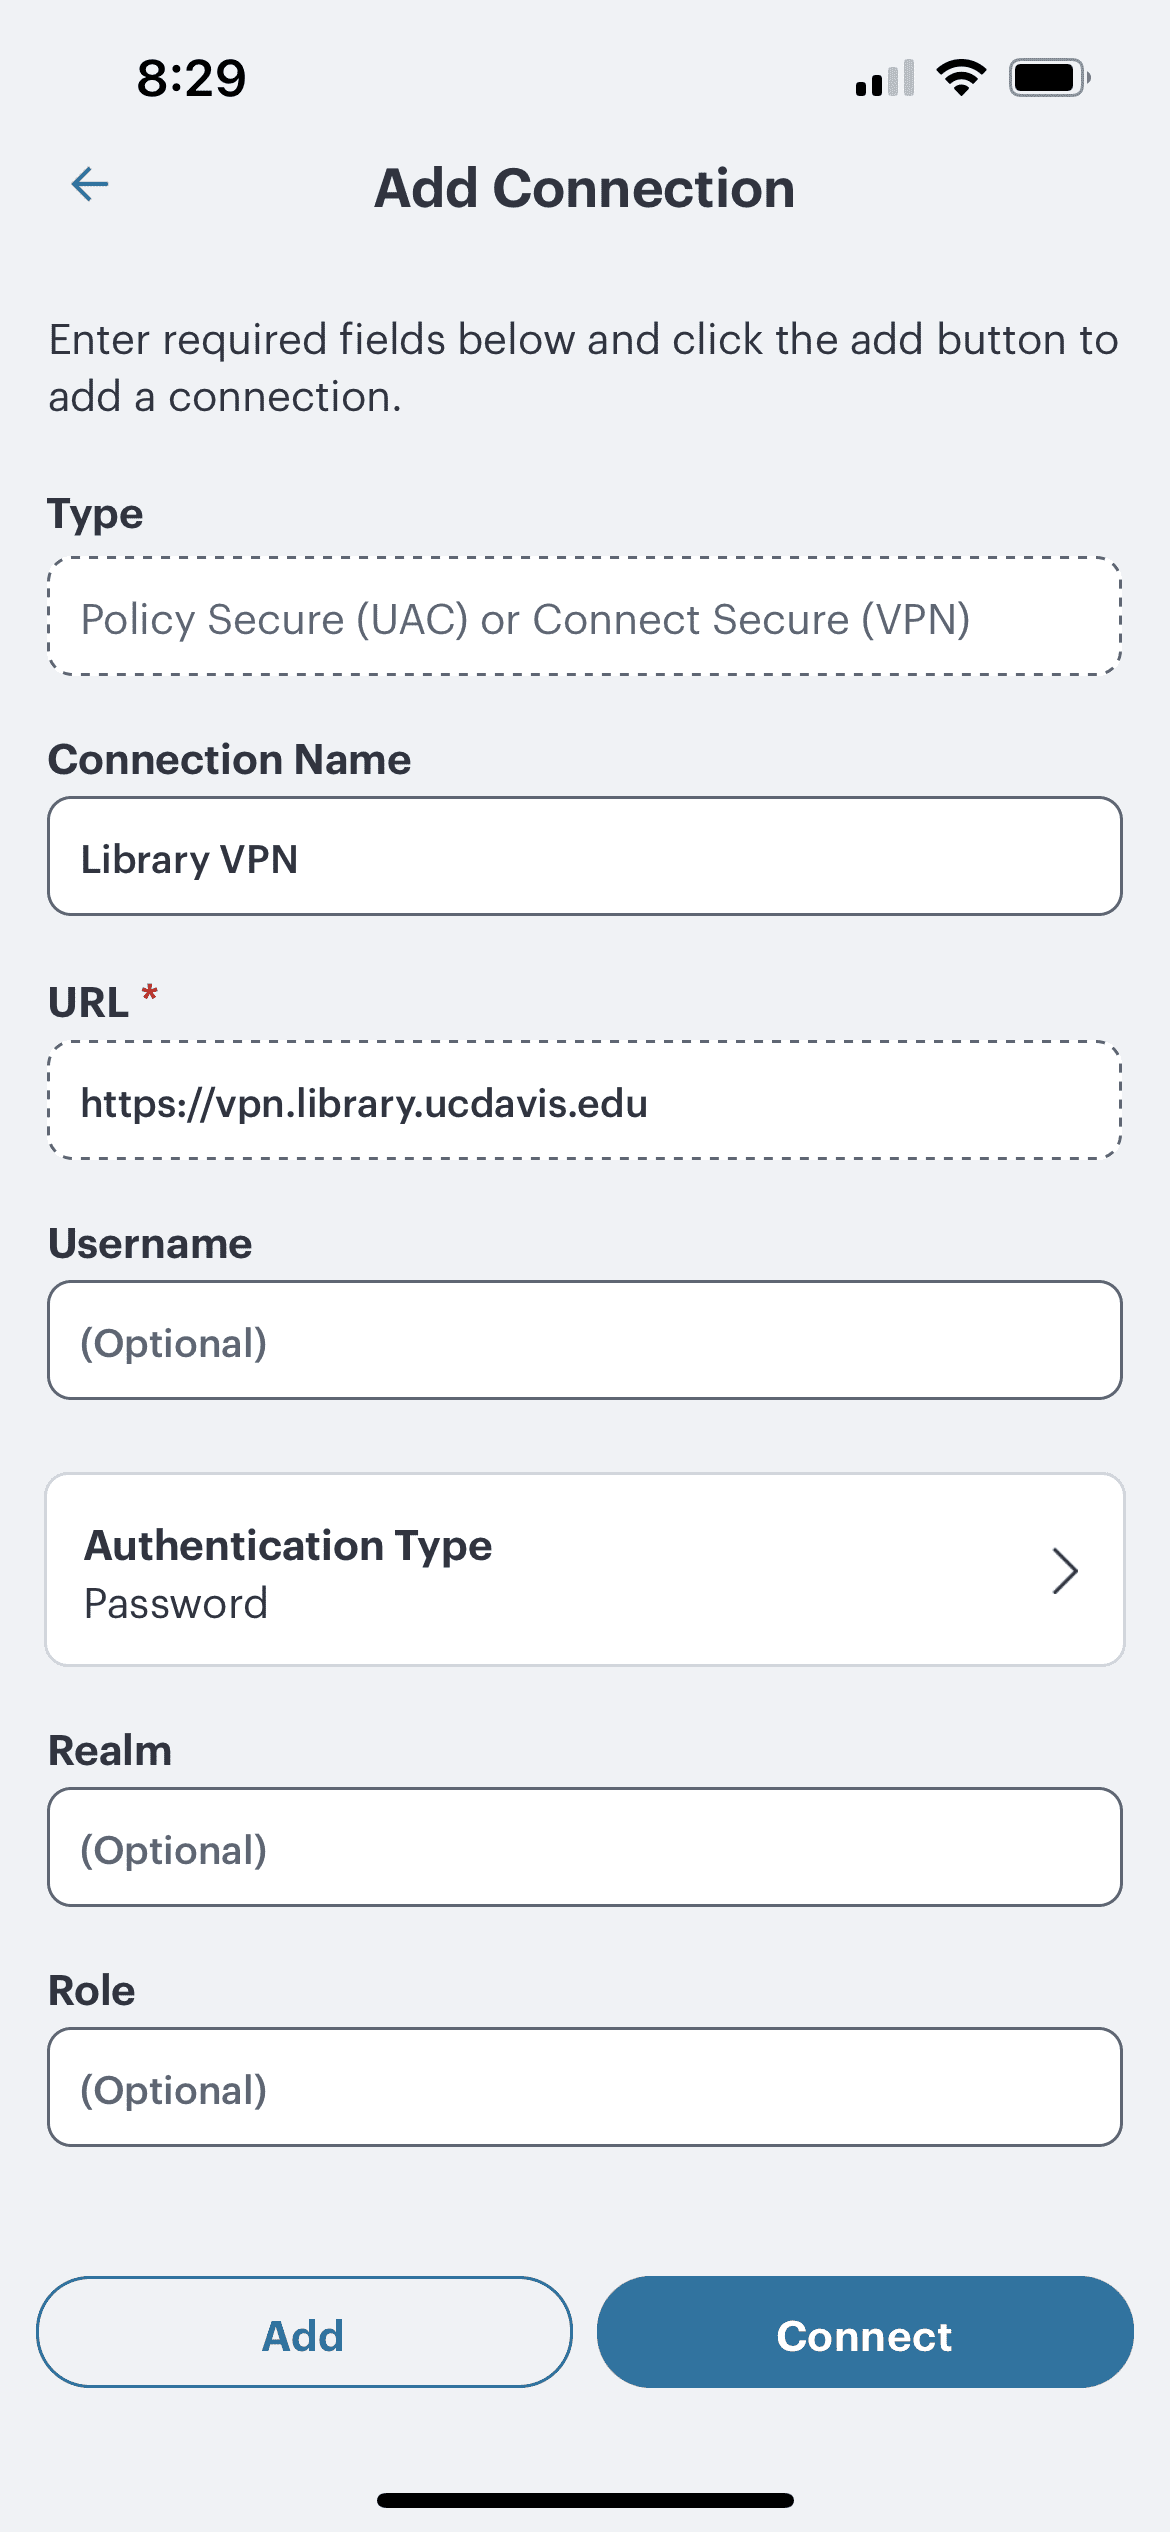
- Under Connection Name, type a name of your choosing (we recommend “Library VPN”) and under Username, type your UC Davis Kerberos (CAS) username. Do not alter anything else. Select Connect.

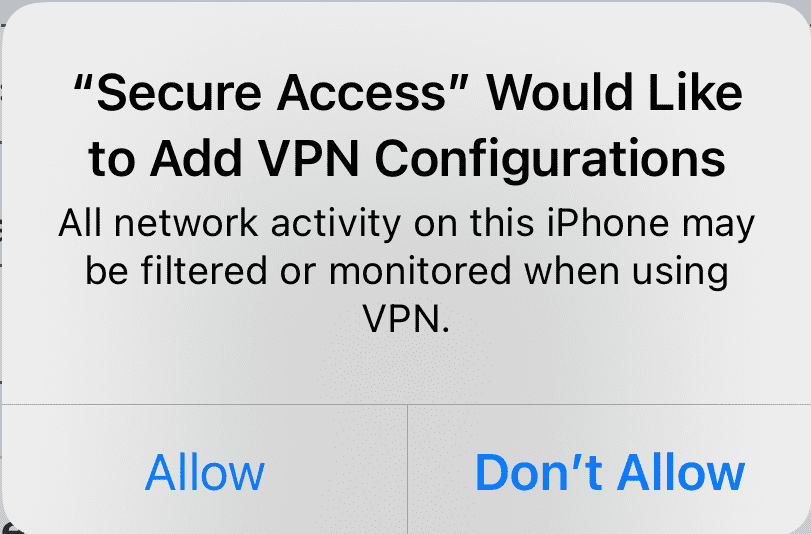
- If your device asks whether or not you’d like to add VPN configurations, select Allow.
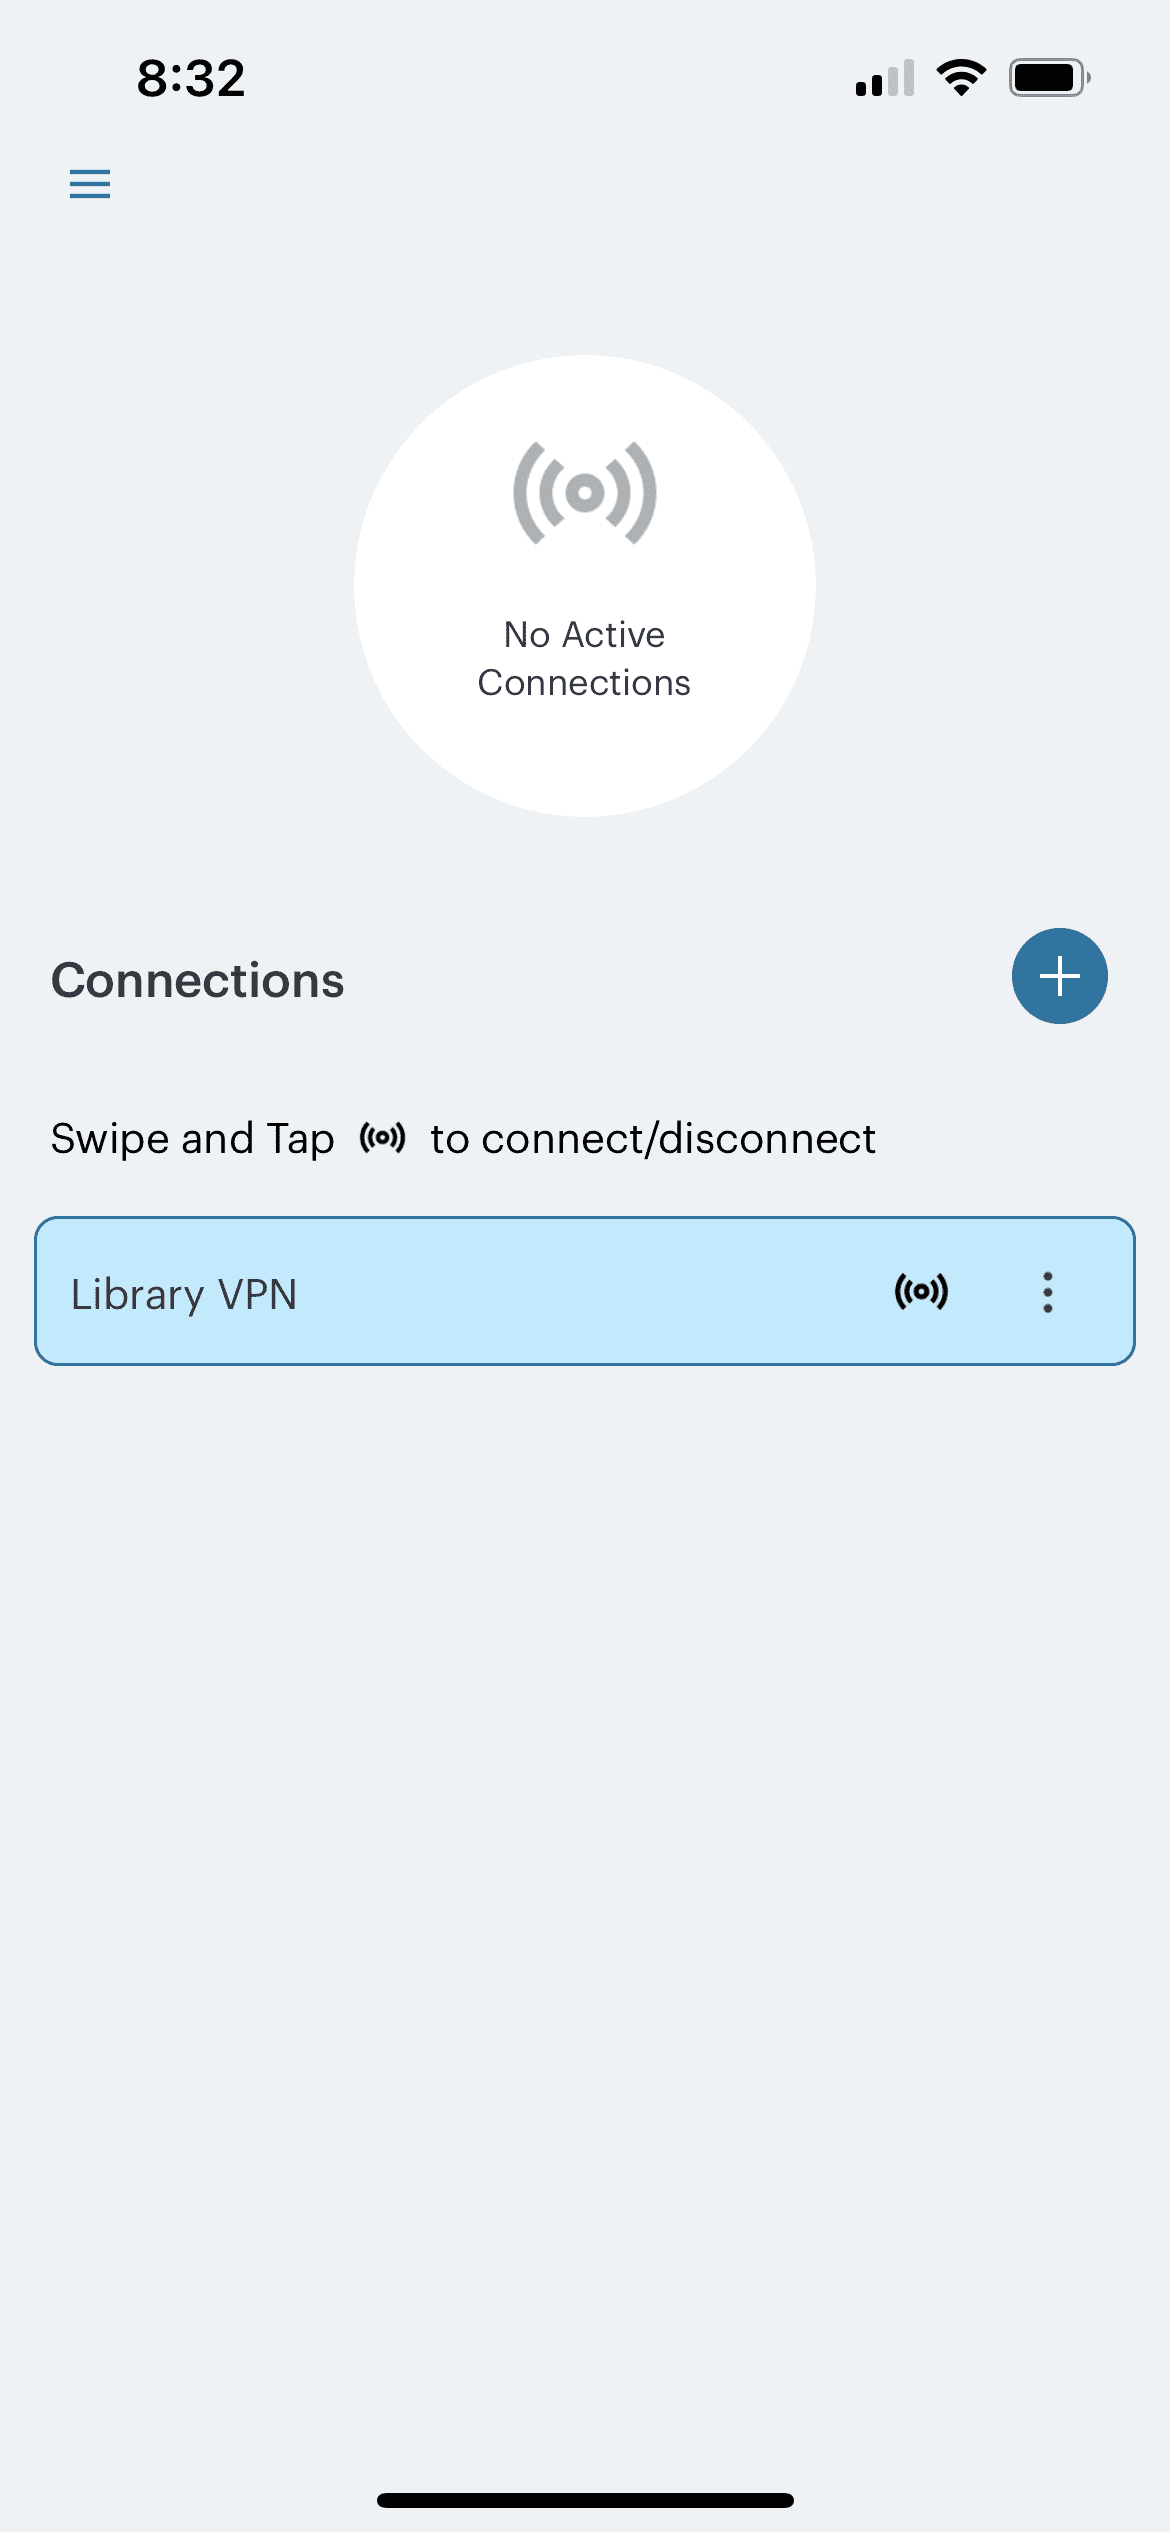
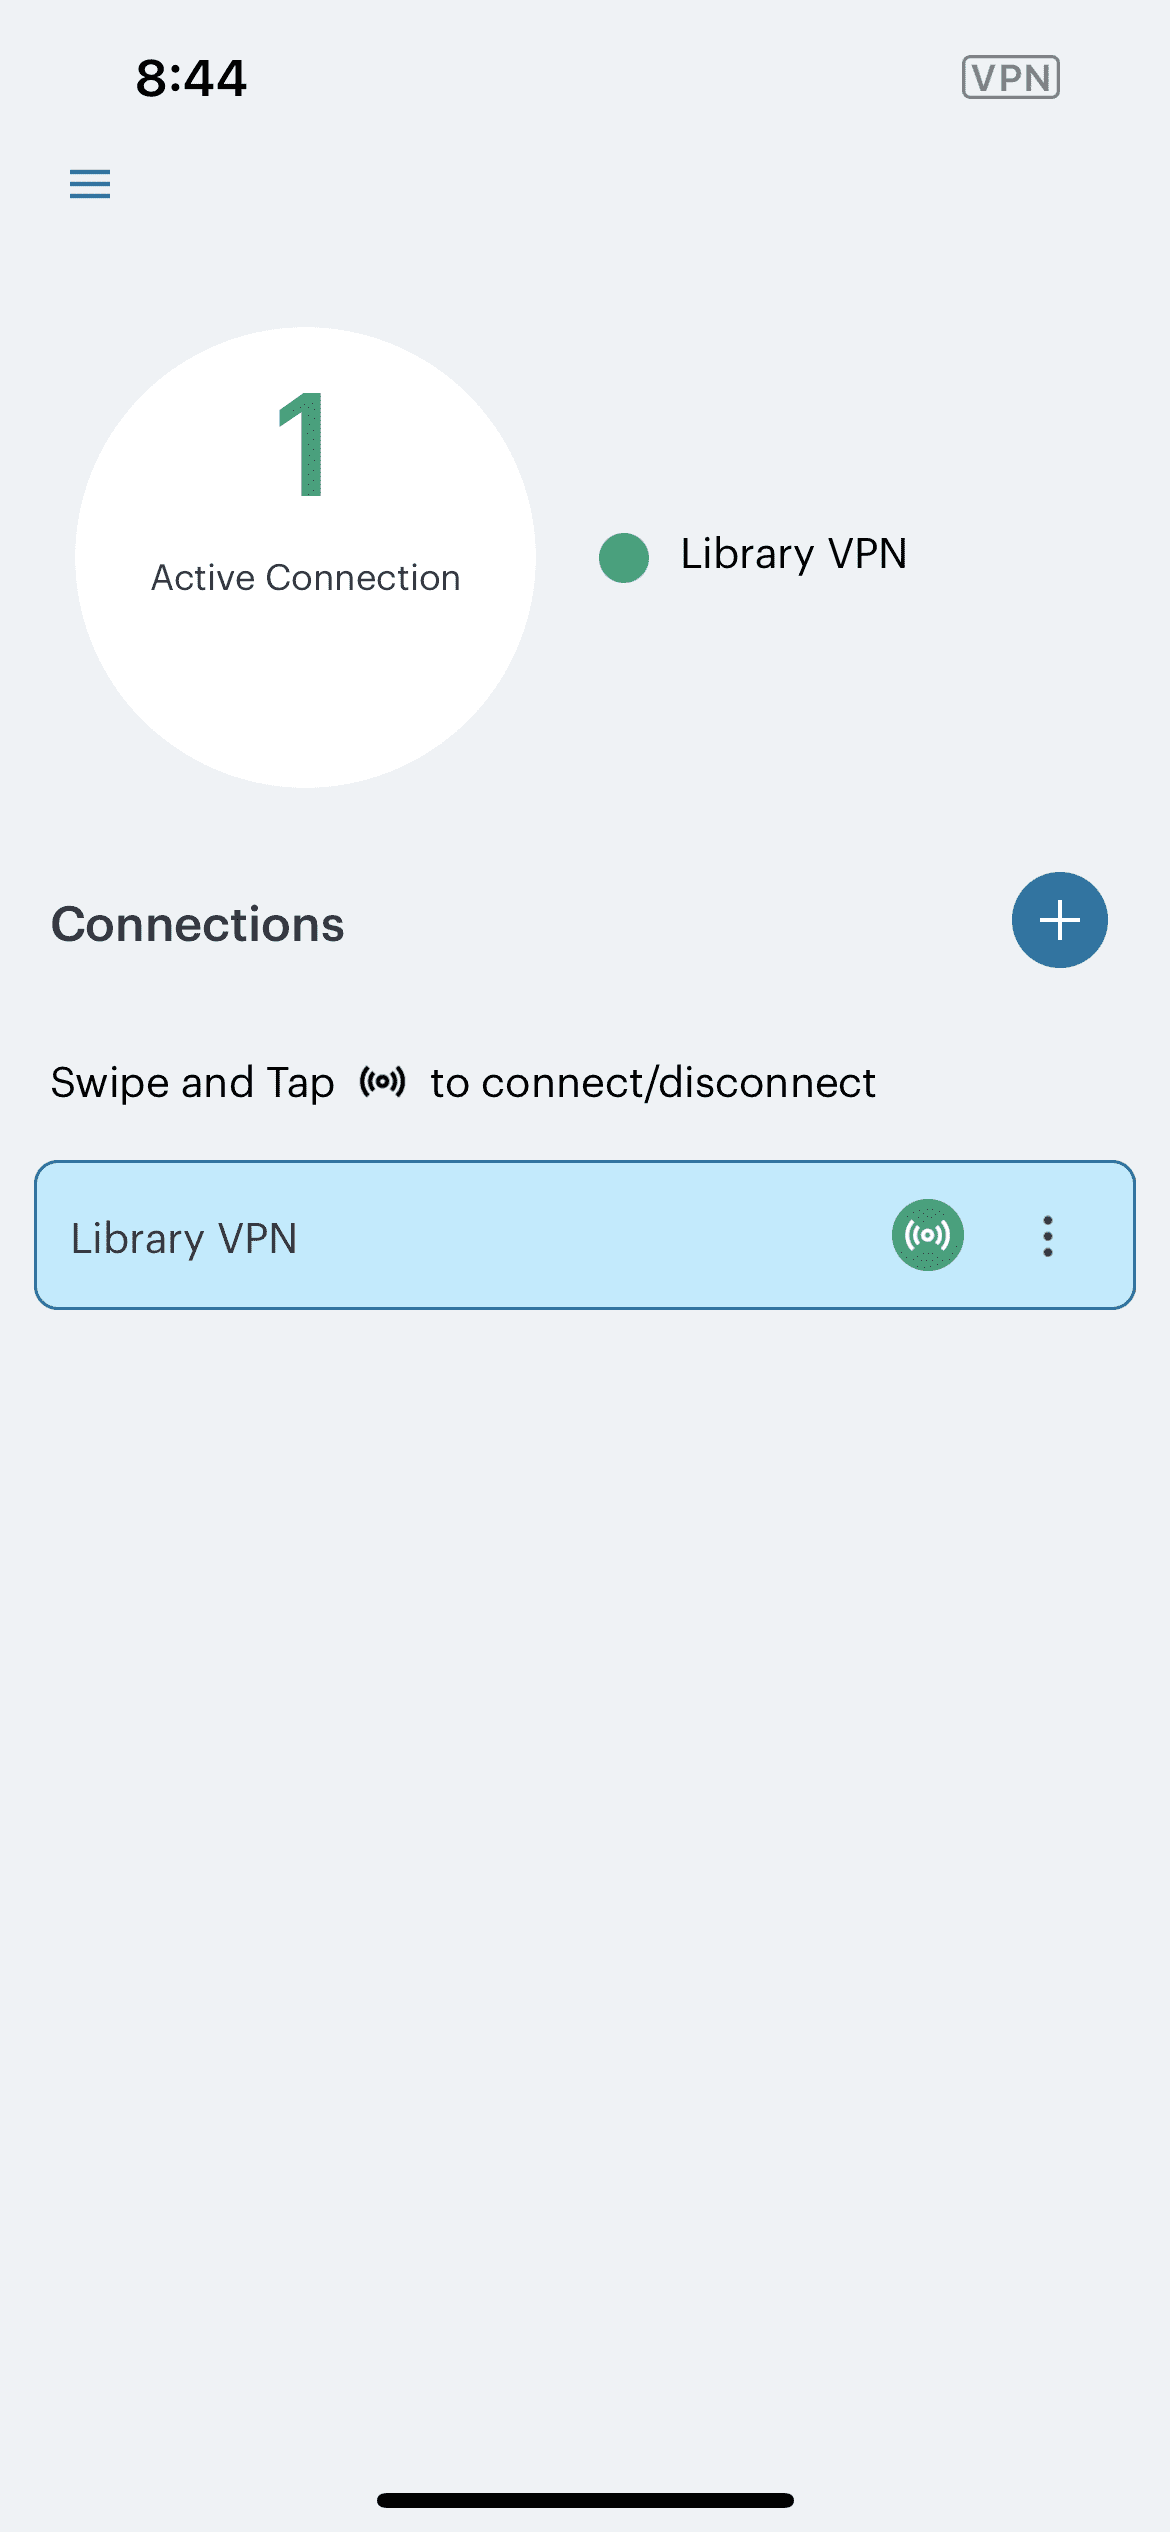
- Your new connection will appear on the Secure Access home screen. Swipe the connection and select the ((o)) icon to initiate the connection. Alternately, select the triple dot icon and then select Connect from the pop-up menu.
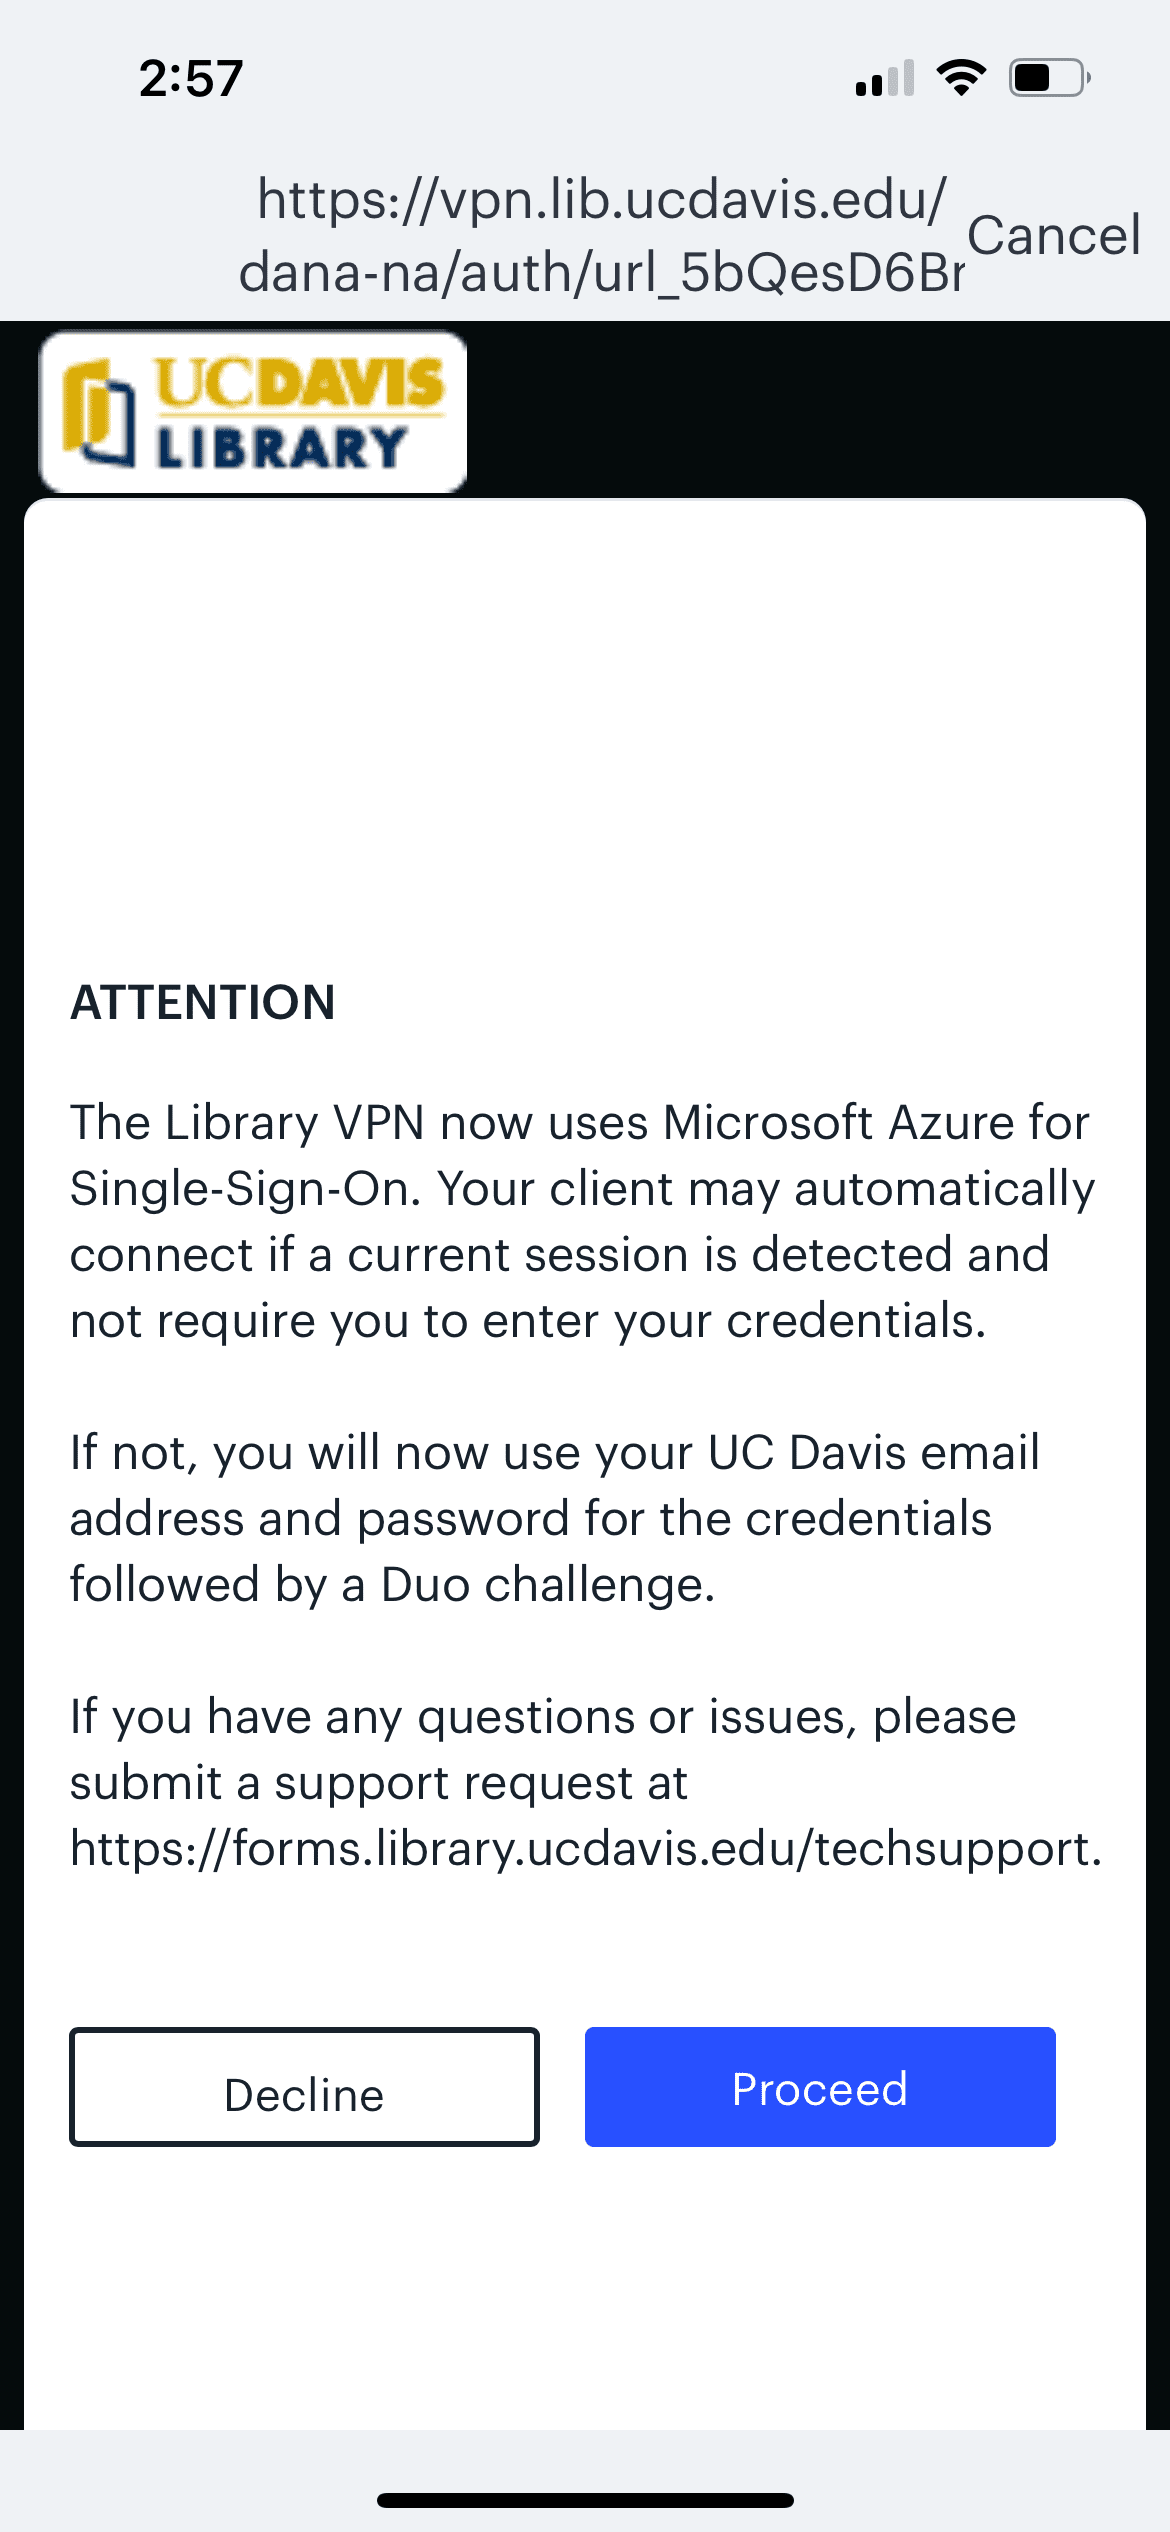
- When a single-sign-in notice appears, select the Proceed button. A Microsoft sign-in box will appear. Enter your UC Davis email address and then sign in using your UC Davis credentials. You will then be asked to authenticate using Duo (see our Library VPN FAQ for Duo authentication options). Note: UCDH users that have an @health.ucdavis.edu email account MUST use their @ucdavis.edu email address for Library VPN authentication. The @health.ucdavis.edu address will not work.
- Once the connection is established, the icon on your Library VPN connection will turn green.
Congratulations, you are now connected to the library VPN and have access to the library’s resources!